%20--%3e%3cdefs%3e%3cstyle%3e%20.st0%20{%20fill:%20%23061b40;%20}%20.st1%20{%20fill:%20%23306af1;%20}%20.st2%20{%20fill:%20%235ce5cf;%20}%20%3c/style%3e%3c/defs%3e%3cg%3e%3cpath%20class='st0'%20d='M55,10.5h9v3h-9v9h12V7.5h-12v3ZM64,19.5h-6v-3h6v3Z'/%3e%3cpolygon%20class='st0'%20points='69%2016.5%2078%2016.5%2078%2019.5%2069%2019.5%2069%2022.5%2081%2022.5%2081%2013.5%2072%2013.5%2072%2010.5%2081%2010.5%2081%207.5%2069%207.5%2069%2016.5'/%3e%3cpolygon%20class='st0'%20points='95%2010.5%2095%207.5%2083%207.5%2083%2022.5%2095%2022.5%2095%2019.5%2086%2019.5%2086%2016.5%2095%2016.5%2095%2013.5%2086%2013.5%2086%2010.5%2095%2010.5'/%3e%3cpath%20class='st0'%20d='M40,1.5v21h11.6l1.4-1.4v-7.6h0c0,0-1.4-1.5-1.4-1.5l1.4-1.4V2.9l-1.4-1.4h-11.6ZM50,19.5h-7v-6h7v6ZM50,10.5h-7v-6h7v6Z'/%3e%3c/g%3e%3cpath%20class='st1'%20d='M23.1,24L14.7,4.8l-4.9,11.2h3.8l-1.8,4H3.3L12.1,0H2C.9,0,0,.9,0,2v20c0,1.1.9,2,2,2h21.1Z'/%3e%3cpath%20class='st2'%20d='M34,0h-16.8l10.6,24h6.2c1.1,0,2-.9,2-2V2C36,.9,35.1,0,34,0ZM32.5,20h-4V4h4v16Z'/%3e%3c/svg%3e)
This is the fourth article in the MCP client introductory tutorial series: "MCP Client Introductory Tutorial - Installation and Configuration of Trae".
This tutorial introduces how to install the Trae IDE and configure the MCP service, helping you quickly master the combined use of Trae and MCP and improve AI programming efficiency.
1. What are MCP and Trae
1.1 Introduction to MCP
MCP (Model Context Protocol) is an open - standard protocol launched by Anthropic. It aims to provide a standardized interface for large language models (LLMs) to interact with external data sources and tools. The core functions of MCP include:
- Tool Invocation (Tools): Allows AI models to call external services and APIs
- Resource Access (Resources): Provides the ability to access structured and unstructured data
- Prompt Templates (Prompts): Pre - defines workflows to simplify repetitive tasks
Through MCP, AI models are no longer limited to training data but can obtain the latest information in real - time, call various tools and services, and complete more complex tasks.
1.2 Introduction to Trae
Trae (pronounced: /treɪ/) is an AI - driven integrated development environment (IDE) launched by ByteDance. Similar to Cursor, it is a powerful programming tool that supports Chinese. It is deeply integrated with AI and provides intelligent Q&A, code auto - completion, and AI - based automatic programming capabilities. Trae supports Windows and macOS operating systems and is currently available for free, with built - in advanced AI models such as Claude and GPT - 4o.
The latest version of Trae already supports the MCP function. Through the built - in MCP marketplace, you can quickly add and configure various MCP services, greatly enhancing the functionality and flexibility of the IDE.
2. Installation Steps of Trae
2.1 Download Trae
- Visit the Trae official website: https://www.trae.com.cn/
- The official website will automatically detect your operating system and display the corresponding download button
If you need to select manually, you can click to view all download options and choose the version suitable for your operating system.

2.2 Install Trae
After the download is complete, double - click the installation package and follow the prompts to install:
- Accept the license agreement
- Select the installation location (the default is the program folder on the C drive)
- You can choose whether to create a desktop shortcut
- Click "Install" to start the installation process
2.3 Initial Configuration
After the installation is complete, start Trae. When starting for the first time, you will enter the initial configuration page:
- Click the "Start" button to enter the initial configuration process

2. Select a theme: The options are Dark, Light, and Deep Blue. Choose according to your personal preference.
3. Select the display language: The options are Simplified Chinese and English. Choose the language you are used to.

4. Click the "Continue" button to complete the selection of the theme and language
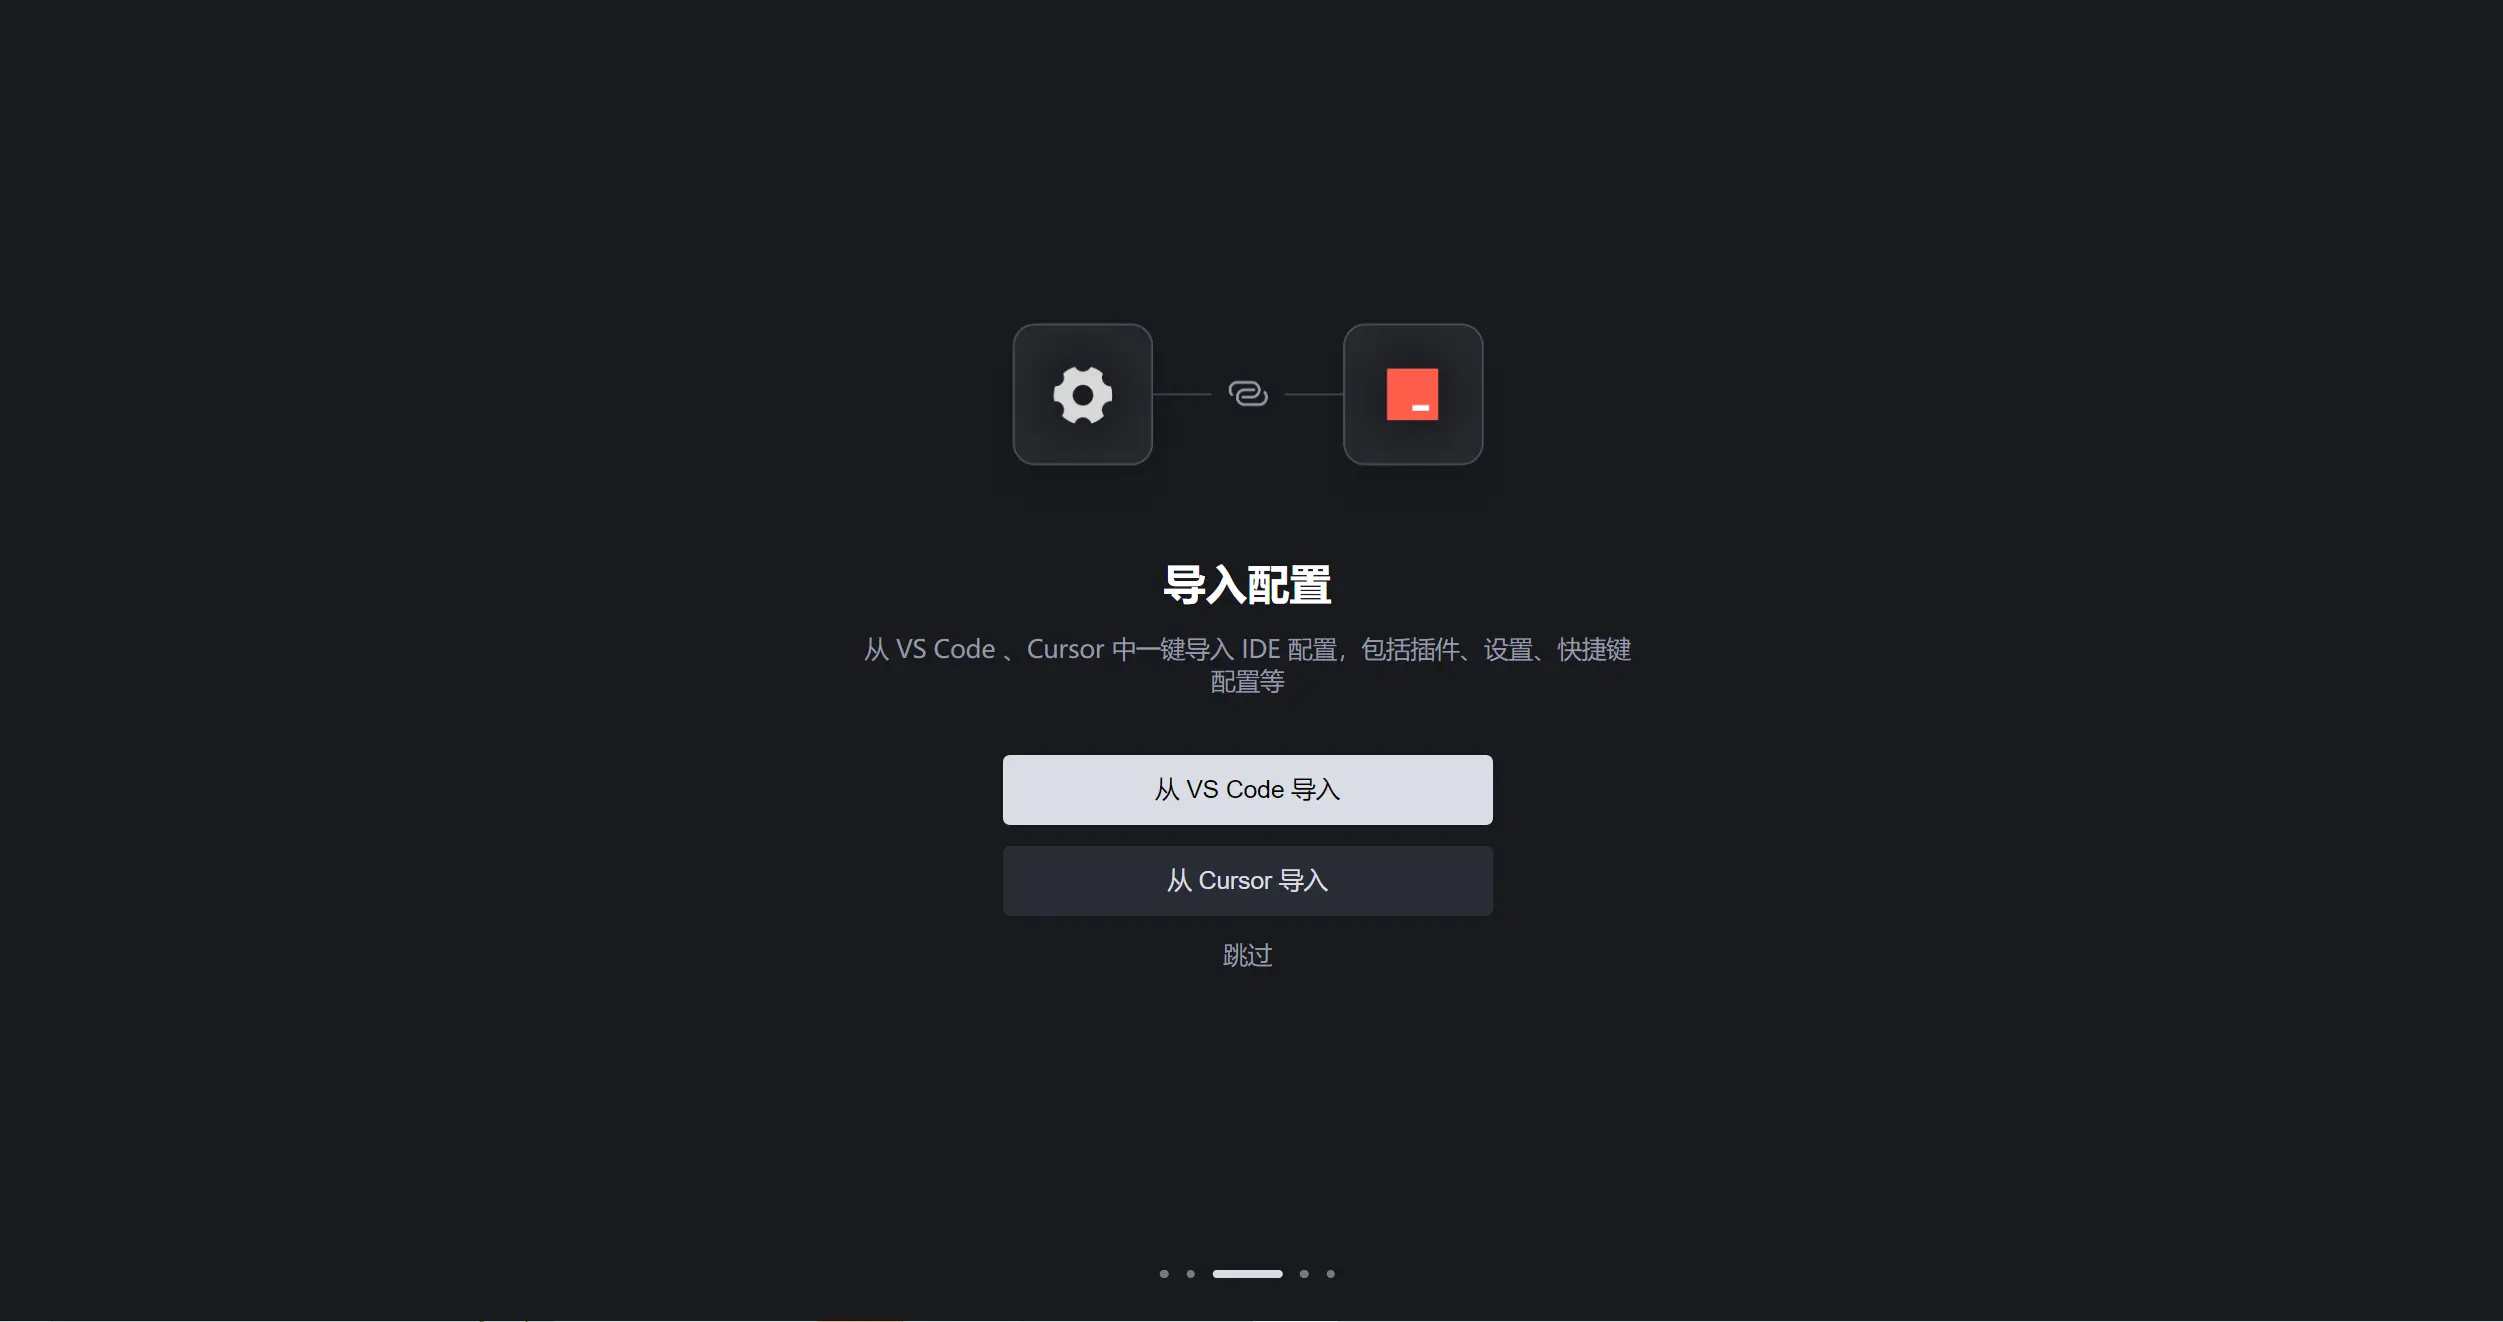
2.4 Import Configuration (Optional)
If you have used VS Code or Cursor before, you can choose to import the existing configuration:
- Click the "Import from VS Code" or "Import from Cursor" button
- The system will automatically obtain information such as plugins, settings, and shortcuts from the corresponding IDE
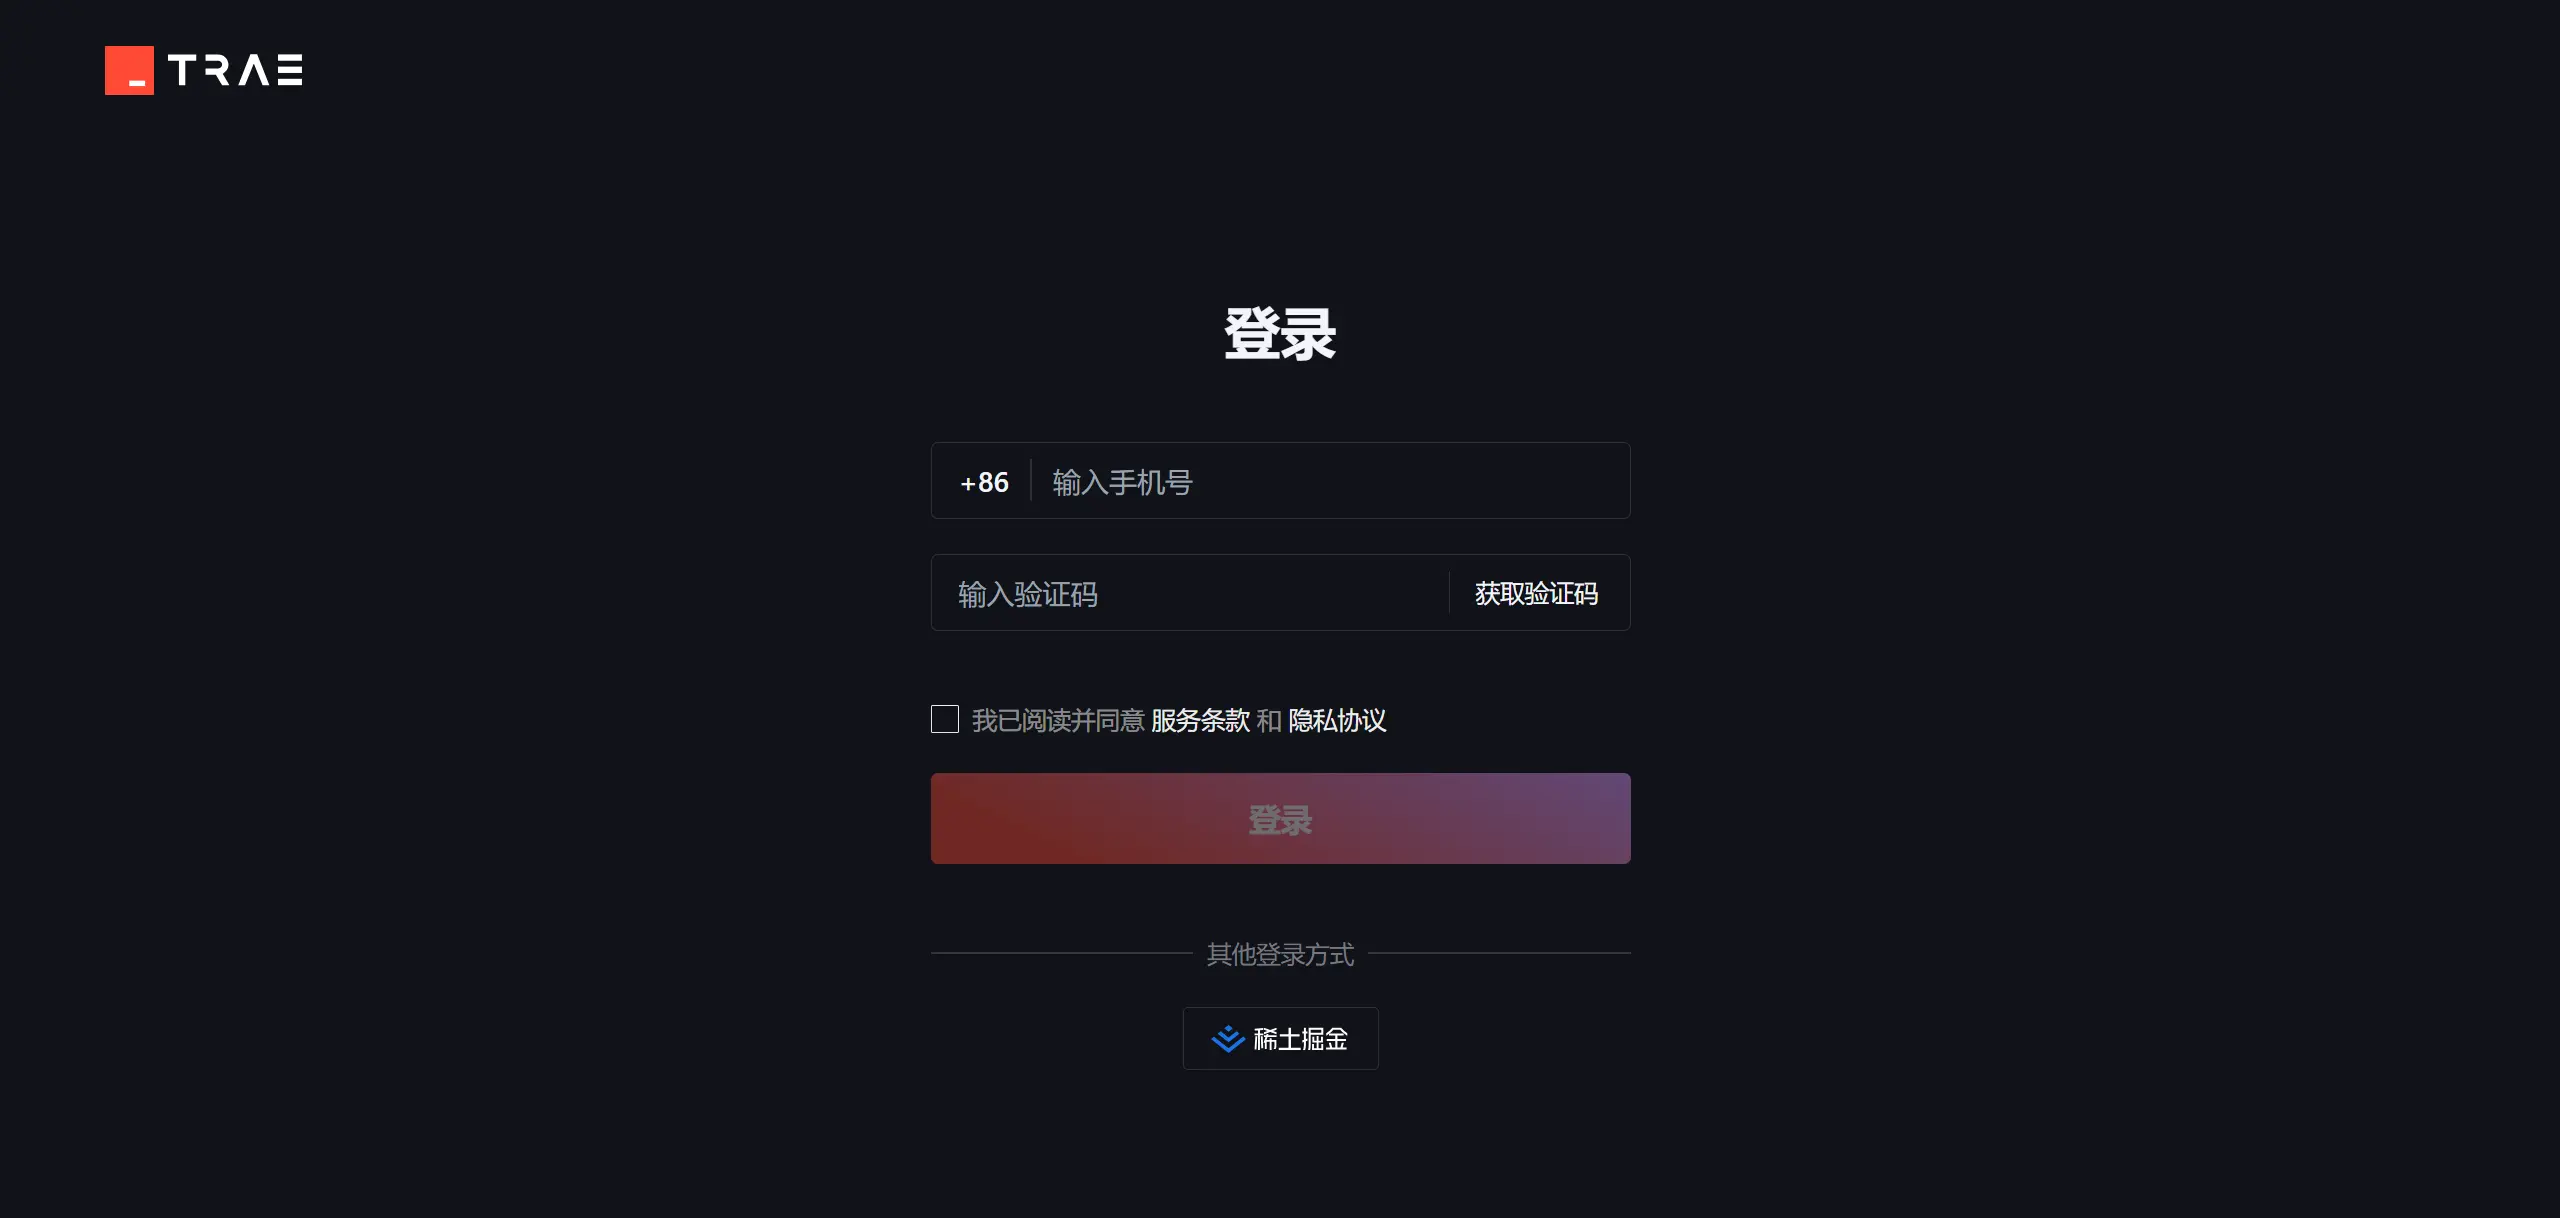
2.5 Log in to an Account
To use the AI functions of Trae, you need to log in to an account:
- Log in to Trae using your mobile phone number
- Complete the verification process
- After successful login, you can use Trae's AI services
3. Configure the MCP Service in Trae
3.1 Update Trae to the Latest Version
Make sure your Trae is the latest version because the MCP function was added in a relatively new version:
- Open Trae and click the settings icon in the lower - left corner
- Select "Check for Updates"
- If there is an update, complete the upgrade as prompted
3.2 Enter the MCP Configuration Page
- Click the settings icon in the lower - left corner
- Select the "MCP" option in the settings menu

3.3 Browse the MCP Marketplace
After entering the MCP configuration page, you can see the MCP server management interface:
- Click the "Add" button to enter the MCP marketplace
- Browse various available MCP services in the marketplace

Currently, the MCP marketplace of Trae offers hundreds of services, covering multiple fields such as web automation, data processing, and code generation.
3.4 Add an MCP Service
Method 1: Add directly from the MCP marketplace
Take adding Puppeteer (a web automation tool) as an example:
- Find the Puppeteer service in the MCP marketplace
- Click the service name to view detailed information
- Click the "+" button to add the service

Click "OK" to add. For most services, Trae will automatically complete the configuration without manual intervention.

After successful addition, a "Added" prompt will be displayed.

Method 2: Manually configure the MCP service
For some MCP services that require specific configuration (such as services that require an API key), you need to perform manual configuration:
- Find the service that needs to be configured in the MCP marketplace
- Click the "+" button and select "Manual Configuration"

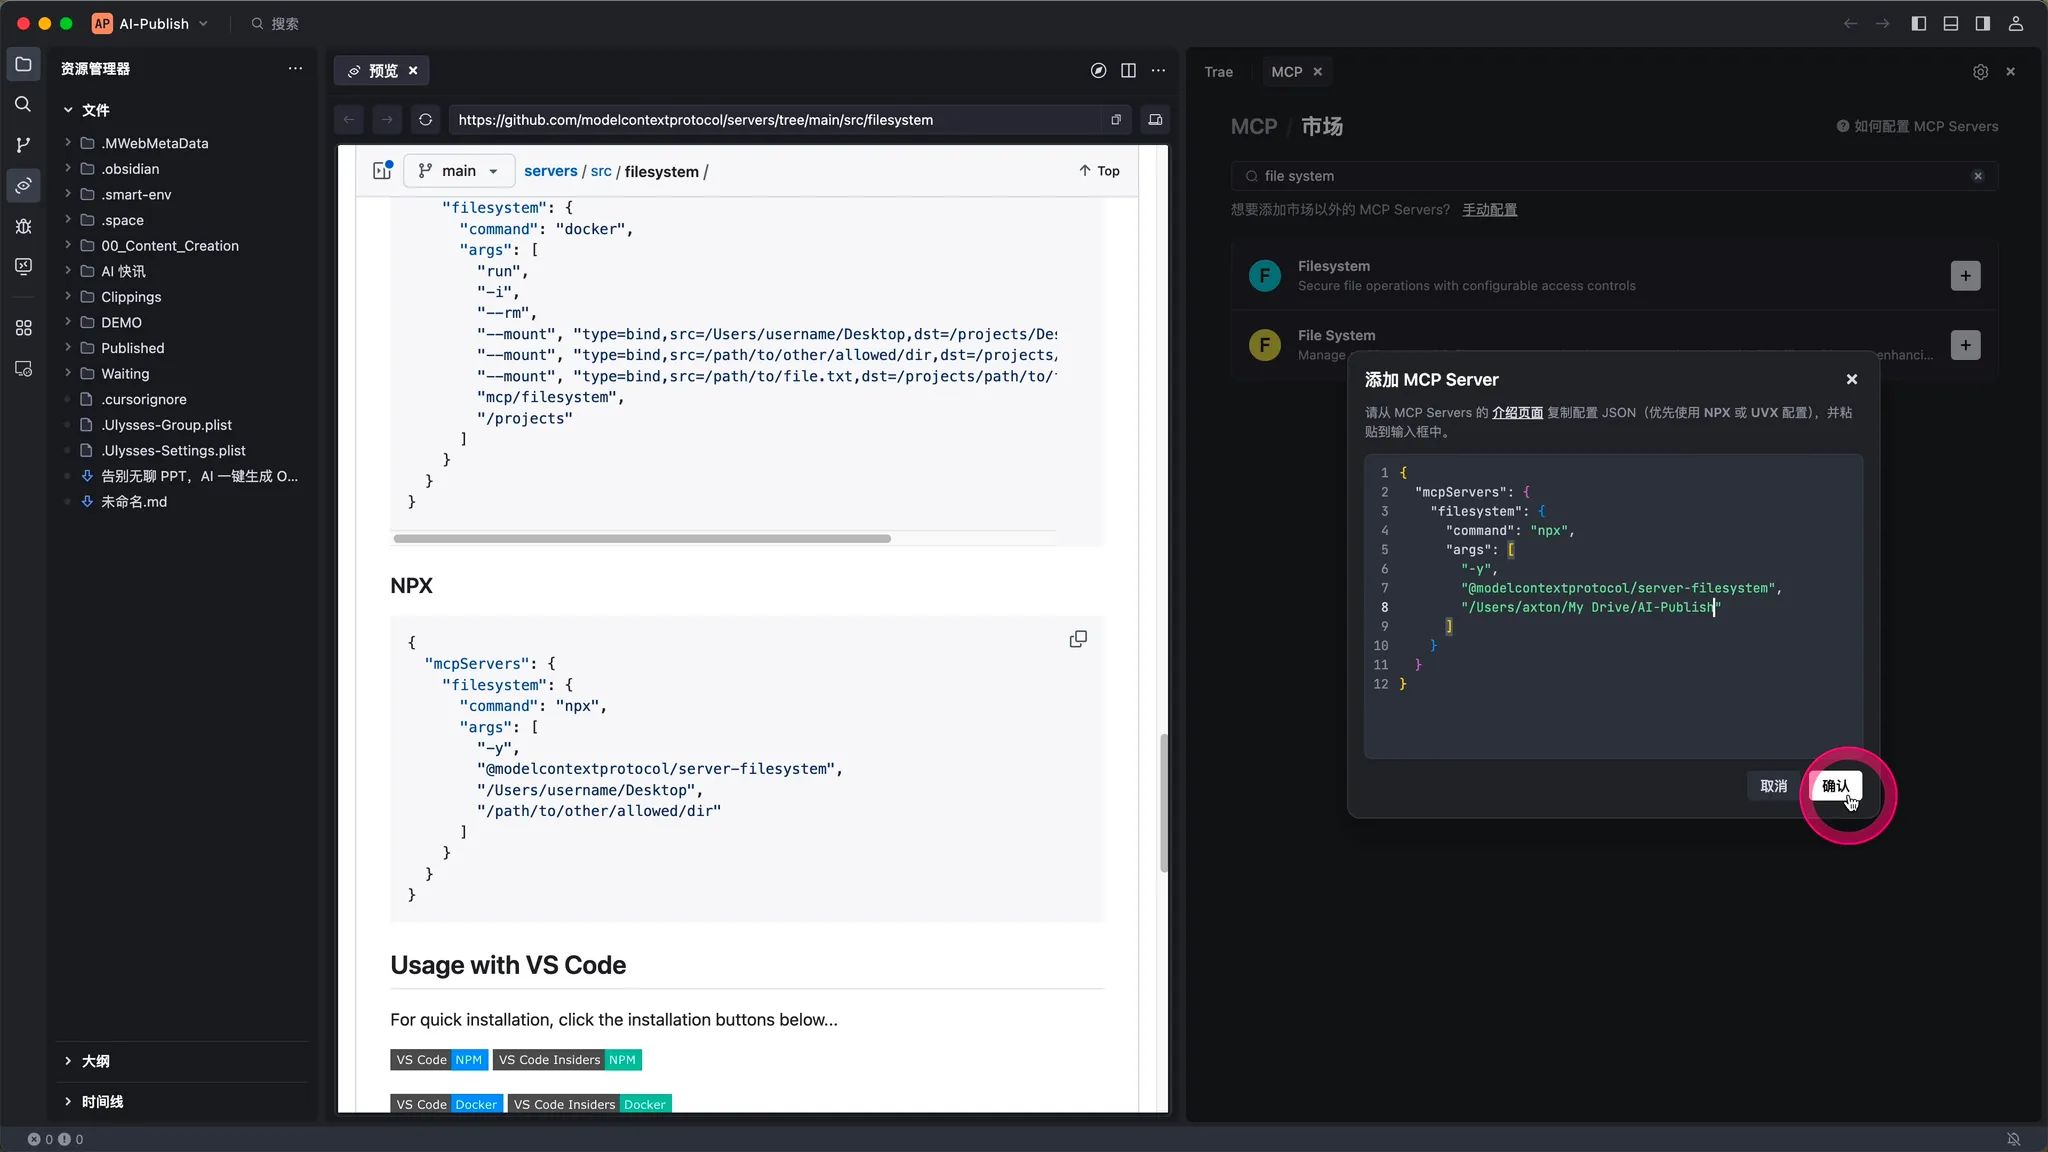
3. Fill in the necessary information in the configuration window, such as the API key and service address

4. Click "Confirm" to complete the configuration. It should be noted that if the built - in server of Trae's MCP marketplace cannot meet your needs, you can obtain the MCP service JSON parameters from a third - party marketplace, copy the code fields, and paste them in.
For example, if AIbase needs the service of fetching web pages, it can obtain the JSON fields from the MCP square of Magic Tower.

Then copy and paste the field parameters and click "Confirm" to successfully add the service.

3.5 Confirm the MCP Service Status
After the addition is complete, return to the MCP server list and confirm that the service status is "Available":

At this time, the added MCP service has been successfully added to Trae's built - in agents and can be used in conversations.
In the same way, AIbase has configured multiple MCP services here, including audio generation "minmax", image generation "fal - ai - image", etc. Next, let's continue to learn how to use MCP services in Trae.
4. Use MCP Services
4.1 Select an Agent
After configuring the MCP services, you need to enable the agent to call these services.
In the Trae conversation panel, you can select an agent with the MCP function:
- Open the AI panel of Trae and select the "Builder with MCP" agent from the drop - down menu. After selection, you can see the list of currently available MCP tools.

2. You can also select "Create an Agent" from the drop - down menu,

On the agent creation page, fill in the name and instruction words, and select the MCP tools you need to call. In this way, the agent can automatically select and call the appropriate MCP tools according to your instructions.

2. Select the MCP services you need
4.3 Example Demonstration
AIbase demonstrates an example of creating an agent to call the MCP services of web page scraping and audio generation here
- Create an audio assistant agent. Enter the agent prompt words in the dialog box and check the MCP services of web page scraping fetch and audio generation minimax that you need to use.
"Summarize the content of the URL into a 100 - word copy, and then convert the text into audio."

2. Next, as long as you select the @audio assistant agent in the Trae chat window and input a URL page, the agent can automatically call the fetch and minimax services. It will summarize the page content and then generate audio.
For example, when AIbase inputs the link "https://www.chinaz.com/ainews/17477.shtml", the agent automatically summarizes it in 100 words:
"Nano AI released the MCP all - purpose toolbox, with over 100 pre - installed services and 18 API keys, supporting multi - modal generation and deep search, and simplifying the MCP configuration process. The tool is suitable for content creation, enterprise automation, education, etc., and is currently in the internal testing phase."

Finally, the 100 - word copy is automatically generated into audio. The effect is as follows:
t2a_Nano AI released MCP all - purpose_20250424_145044.mp3
4.5 Advanced: Add the Figma MCP Service
The Figma MCP service can help developers quickly convert design drafts into code:
- Find the Figma AI Bridge in the MCP marketplace
- Click "Add" and select "Easy Configuration"
- Generate a personal access token on your Figma personal homepage (you can obtain it by following the instructions on the page)
- Paste the token into the configuration interface and click "Confirm"

After the configuration is complete, you can use it through the following steps:
- Select the "Builder with MCP" agent
- Enter an instruction such as "Generate front - end code from my Figma design draft"
- The agent will obtain the Figma design information and generate the corresponding code
5. Common Problems and Solutions of MCP
5.1 The MCP service cannot be connected
Problem Description: After adding the MCP service, the status is displayed as "Offline" or "Unable to connect".
Solution:
- Check if the network connection is normal
- Confirm if the MCP service configuration is correct
- Try to restart the Trae application
- Check the firewall settings to ensure that they do not block MCP service communication
5.2 The MCP service call fails
Problem Description: An error occurs or there is no response when using the MCP service.
Solution:
- Check if "Automatic tool invocation" is enabled
- Confirm if the instructions used are clear and specific
- Try to select other AI models (such as DeepSeek - v3)
- For complex tasks, try to break them down into multiple simple steps
5.3 The MCP service needs to be updated
Problem Description: The MCP service version is too old, and the functions are limited.
Solution:
- Find the service that needs to be updated in the MCP service list
- Click the "Update" button on the right side of the service
- Complete the update process as prompted
6. Summary and Outlook
6.1 Current Limitations of MCP
Although MCP is very powerful, there are still some limitations at present:
- The number of available MCP services is limited (there are about one hundred built - in services on Trae at present)
- Different AI models have different levels of support for MCP
- The success rate of executing complex tasks still needs to be improved
- The MCP services in some specific fields have not been developed
6.2 Future Development of MCP
As a standard protocol for AI to interact with the external world, MCP has broad development prospects in the future:
- More third - party developers will join the MCP ecosystem
- The variety and quality of services will continue to improve
- The understanding and use ability of AI models for MCP will be enhanced
- It will be more convenient for users to customize MCP services
6.3 Best Practice Recommendations
To fully utilize the potential of MCP, it is recommended that:
- Keep Trae updated to the latest version
- Try different AI models to find the most suitable one for specific tasks
- For complex tasks, use the step - by - step guidance method
- Regularly browse the MCP marketplace to learn about new services
- Participate in community discussions and share usage experiences and skills
Reference Resources
MCP Client Introductory Tutorial Series
《MCP Client Introductory Tutorial - Installation and Configuration of Cherry Studio》
《MCP Client Introductory Tutorial - Installation and Configuration of ChatWise》
《MCP Client Introductory Tutorial - Installation and Configuration of Cursor》
《MCP Client Introductory Tutorial - Installation and Configuration of Trae》
《MCP Client Introductory Tutorial - Installation and Configuration of Claude》